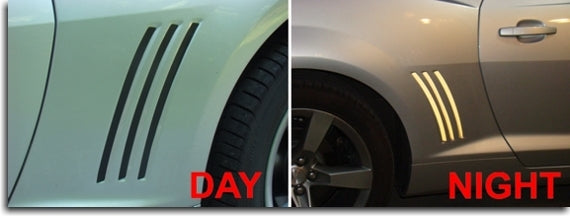
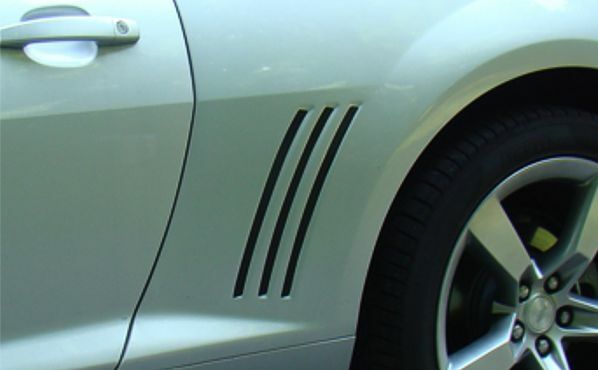
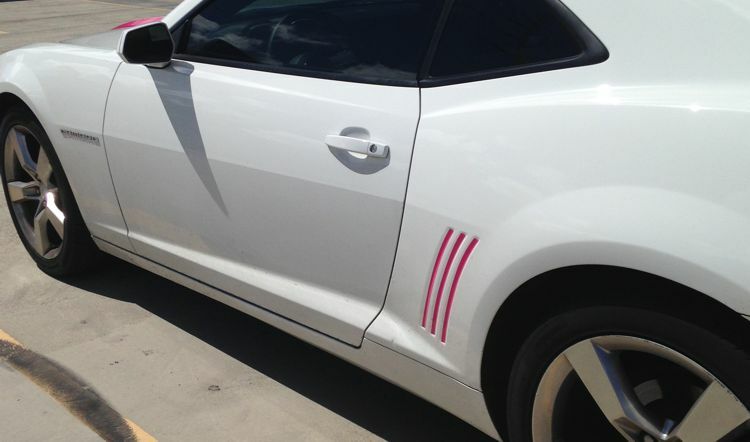
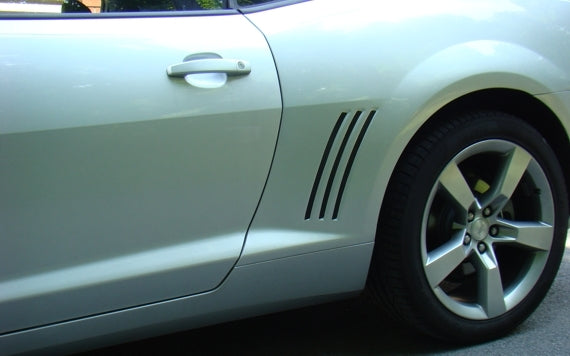
High quality vinyl, computer cut to fit perfectly into the side vent indentations. These are simple to install and will give your Camaro a whole new look.
Reflective colors will provide you with safety AND a good look! Black is popular to give a real "vent" look. See the pictures above to see the black reflecting!
Product Warranty Information
Product Shipping Information
Product Installation Instructions
General suggestions for the installation:
1. We recommend washing the entire car first. Next, clean the application areas (badges, indents, etc…) with rubbing alcohol several times to remove any other oil or dirt. Q-Tips help with cleaning out crevices. Be sure there is no alcohol or water on the badge during the decal application.
2. For best results, work in a relatively warm, dry area and allow the working surface to change to the room temperature before application. It's recommended to work in 50 ° F or warmer) temperatures.
Product-specific recommendations:
Side Vent Decals
• It is ABSOLUTELY ESSENTIAL that you thoroughly clean the indentations out as well as possible. Be sure to get the dirt from the corners so the decals stick.
• The decals are labeled with reference letters for placement: DF, DM, DR and PF, PM, PR.
DF= Driver side Front
PF= Passenger Side Front
DM = Driver Side Middle
PM= Passenger Side Middle
DR = Driver Side Rear
PR= Passenger Side Rear
• The decal is sandwiched between a clear masking and white backing. Carefully peel the decal off of the backing, holding it by the clear masking.
• Hold the decal with one hand at the top and one at the bottom. Align the decal at the top corner by looking through the mask, being careful not to let the decal touch the surface.
• Once you are sure of it's position, start at the top and work your way down, pressing the decal on.
• Run your hand down the decal to ensure it's completely stuck down.
• Remove the clear masking (don't let the reference letters stick to the car) by pulling it back 180 degress.
• If you have any air bubbles, you can pop them with a small pin and work the air out. If you pressed evenly all the way down, there should not be air underneath.
Installation Tips:
• DO NOT pull on/stretch the decal as you're putting it on. If you stretch it out, you could make it too long.
• Try to line it up as best you can at the top corner. If that's a little bit off, your entire decal may look off.
• Line up the decal as best you can while you work it down. Keep it on the “flat” side of the vent.
• These are sized perfectly and do take a little patience to install. Be sure you leave yourself enough time- don't rush this job.