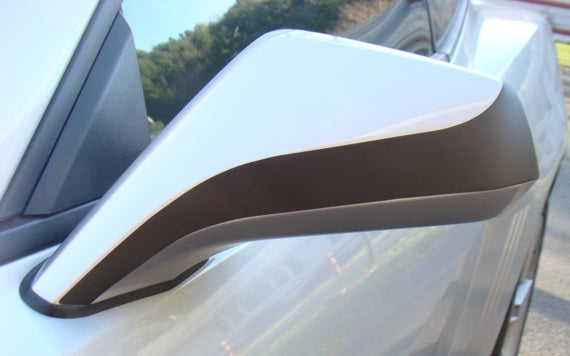
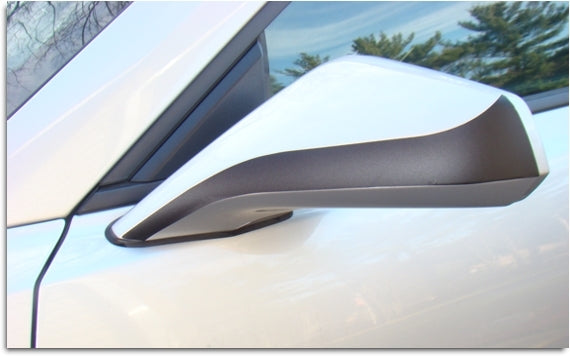
This is a computer-cut vinyl decal designed to accent the factory side view mirrors.
Installation NOTE: The installation of this decal is slightly complex due to the curvature of the mirror housing and requires heating the vinyl to make it fit. A heat gun and spray bottle of water/soap are necessary tools for the installation. Some vinyl installation skills are recommended.
There is NO TRIMMING required!
Color Note: Because the vinyl must be heated, this product is only offered in non-reflective colors.
- A quantity of 1 is for 1 passenger side AND 1 driver side mirror decal. (set of 2)
Product Installation Instructions
General suggestions for the installation:
1. We recommend washing the entire car first. Next, clean the application areas (badges, indents, etc…) with rubbing alcohol several times to remove any other oil or dirt. Q-Tips help with cleaning out crevices. Be sure there is no alcohol or water on the badge during the decal application.
2. For best results, work in a relatively warm, dry area and allow the working surface to change to the room temperature before application. It's recommended to work in 50 ° F or warmer) temperatures.
Product-specific recommendations:
Front Bowtie Overlay
• Use a water/squirt bottle and spray just two sprays of water onto the bowtie on the car.
• Carefully peel the decal from the backing paper. (make sure your hands are clean of grease). Flip it over and give it one to two sprays as well. The water will help slide the decal around. Note: To identify the top of the decal: the wings are pointing up (looks like a smile).
• Align the left wing of the bowtie ensuring the corners match up. DO NOT press it down yet, just let it hang freely. This step of alignment is very important as it will help align the rest of the decal.
• Now, press your finger down on the center crease of the bowtie.
• Carefully pull the right wing over and just tack it down once with your finger. (you may need to lift it later)
• Work from the center left and toward the left smoothing out the decal. The creases should come out very easily. Work our thumb on the decal from the middle to the outer edge.
• Now that the left side is down, work the right side. Start in the middle and work over to the right. You'll notice a crinkle start to form at the top and bottom. Use a hair dryer or heat gun to give it some heat. Pull on the top corner to pull the wrinkle out and smooth it with your other thumb. The top should be done now. Now do the same to the bottom right; pull it out and apply heat, then press the wrinkle out.
• If the right leg is off-centered, just carefully lift it and pull it into place. Once in place, press down firmly working your way to the outside of the emblem.
• Now the entire decal should be down. Work out any bubbles or wrinkles going from the inside of the emblem towards the outside.
• Use your fingernail to press in any vinyl that may have been stretched over the gold center.
• TIP: If you have air bubbles, use a small pin to pop it and work the air out. The pinhole will barely be noticeable.